Cut Crease
August 13, 2013

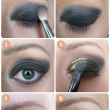
We’re seeing the cut crease slowly start to take over the Internet in the makeup scene… looks hard, huh? It’s not! Here’s a simplified version of a purple cut crease!
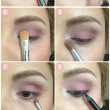
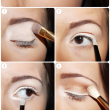
- Prime the eye from top to bottom, and underneath the eye as well. I used MAC’s Paint Pot in Soft Ochre, with my finger.
- Apply a light, matte e/s underneath the eyebrow with a flat brush, for a more opaque application. I used a MAC e/s in Brule, with a MAC #242 brush.
- Apply a medium intense, warm, orangey brown in your crease with a fluffy brush. I used a MAC e/s in Brown Script with a MAC #224 brush.
- Draw a line following your eye shape above your natural crease with a black pencil. The line doesn’t have to be perfect, because it will get blended out in the next step. I used Engraved pencil from MAC.
- Using a small, flat, synthetic brush, blend out the fake crease. I had to keep layering more eyeliner, and blend out, to create a smoother and darker blend.
- Blend in a matte color of your choice, over the black, and higher, with a tapered blending brush. Fig. 1 e/s is my favorite, used with a #217 brush, both from MAC
- Place a frosty shadow on the lid with a paw shaped brush, and pull out a little to create a more feline look. These two are Pink Freeze e/s and #239 from MAC.
- I like my eye very smokey underneath, so I used the #217 brush to apply Fig. 1 e/s.
- Then using black eyeshadow, I used the small flat brush again (#242) to apply black closer to my bottom lash line. The eyeshadow is Carbon from MAC.
- Add a black pencil in your waterline, and winged liner. I used #77 gel liner from Inglot, and a #263 brush from MAC.
- Don’t forget mascara, and your favorite false lashes to complete the look!
Brands: M.A.C.
Super Popular
Comment
-
http://dbakeca.com Dbakeca Italia
-
http://milano.bbakeca.com/ BBakeca
-
http://itstartedwithido.wordpress.com Itstartedwithido
-
Andy Fabulous
