The Ultimate Faux Hawk
March 20, 2014

Disclaimer: This hairstyle is for the bold, brave and ultra glamorous! It also takes a tad bit longer than most tutorials I have posted. If you’re up for the challenge, check out the steps below for the Ultimate Faux Hawk!
Step 1: Curl your hair. For the best results, try to make tight curls and clip them up to let them set for a few minutes. The more volume you start with, the better!
Step 2: Divide your hair into three sections: The top section needs to be clipped up out of the way, the Middle section needs to be a sleek, tightly secured ponytail, and the bottom section needs to be a low ponytail.
Steps 3 & 4: Once the bottom section is secured into an elastic, take your middle section and make sure it is tight and sleek on both sides (this is the part of the hairstyle that gives the necessary ‘faux hawk’ impression!). Take some of the curls and secure with bobby pins to cover the base of the bottom ponytail.
Step 5: Here is the fun part! Starting with the back of the top section working your way forward, begin to tease and pin portions of the hair back. This is crucial to give the end result volume.
Steps 6, 7, and 8: Do a once over and secure any loose pieces in place, then spray with hairspray!
Voila! Keep in mind that this edgy hairstyle pairs great with a super girly ensemble! Play around with this look and dress it up with glam accessories and bold red lip! Enjoy!

The Faux Side Shave Braid
April 12, 2013

The majority of our favorite hair trends are influenced by top celebrities. A recent trend seen on top celebrities such as Rihanna, is a style that you’ll have to be ready to commit to! While the side shave can be a little shocking, we can’t deny the edgy appeal it exudes. Love it but don’t have the guts? Well you’re in luck. There is a faux side shave braid that will give you the badass look your aiming for, without sacrificing your locks. Follow the steps below to master this edgy style!
Steps 1 & 2: Start by parting your hair to the side you want left down. The key is to give yourself a dramatic part, so at least 3/4 of your hair should be to one side. (more…)
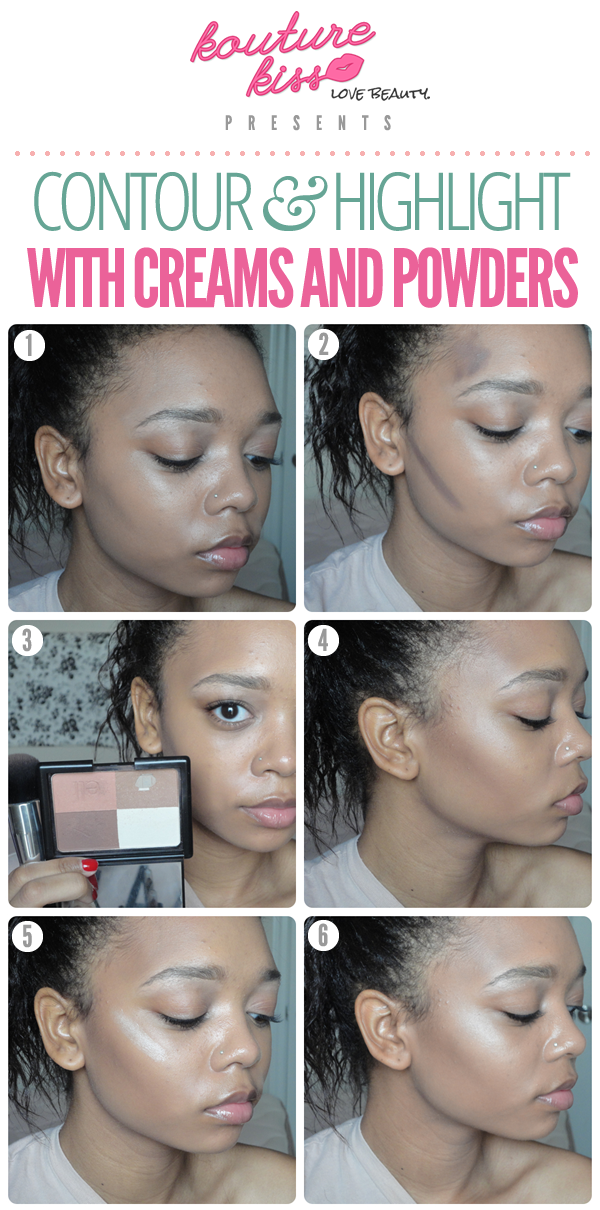
How To Contour & Highlight With Creams And Powders
March 13, 2013
With contouring, you can sculpt your face into whatever shape you like. To add shadows or depth, we’re going to use darker powders or creams. Usually, the key places to contour are the hollows of the cheeks (You can find these by sucking your cheeks in like a fishy face), the temples, and the jawline. However, you can pretty much contour wherever you’d like! (Even your nose or eyes – it will help add dimension to your face if it’s looking a bit flat.) When contouring it’s best to use matte products (without shimmer), because this will be more natural looking. (more…)
The Reverse French Braid
February 13, 2013
Although classic styles are a reliable go-to, every tradition needs a stylish update. A great example is the reverse french braid. While the classic french braid holds it’s own, this fun and quirky braid is a great version! See the steps below!
- Start as you normally would with a french braid by taking a section of hair and dividing it into 3 strands.
- As a second step, rather than placing the pieces over each other like a classic french braid, place them under each other. This is what will give your finished braid the ‘reverse’ look. (more…)


