The Glitter Dipped Mani
August 7, 2012
Go for the ultra glam look and let your nails do the talking with glitter tipped nails. It is super simple and with a few speedy steps you’ll be ready to show off this unique mani!

- Paint your nails a solid color for your base. Make sure your solid-colored mani is fully dried before moving onto step two.
- The top coat/clear polish will be your “glue” base. Stroke the top half of each nail with a thin layer of clear polish. With your hand over a piece of paper to catch the glitter, sprinkle an even layer on the wet part of your nail. Tap excess glitter off. Let nails dry and repeat on second hand.
- After waiting a few minutes for the clear coat and glitter to set, brush a coat or two of clear gloss over your nails for a super-slick finish. This will also help to keep glitter on longer!
Happy mani-curing, beauties!

Gradient Glitter Mani
July 30, 2012
The cousin to the ever popular ombre is the ever stylish gradient. If we’re talking math terms here, gradient simply means the variation of space by a quantity represented on a slope. And by slope I totally mean your nails. I’m using glitter to create my gradient, three to be exact, as I encourage you to use at least two or more glitters for this look. Now let’s get into it!

- Apply a base colour coat to your nails and allow it to fully dry. Following that by applying a thin line to the tips of your nails with a darker shade of your base coat. Now, don’t go too dark as this colour will peak in through your glitter. This line just adds a bit more depth to the gradient without piling on so much glitter which can get clumpy. (more…)
Plaid Mani
July 12, 2012
Prep your nails (get it? Because its plaid) for this fun manicure. The technique here is very simple, but fun and innovative. It deals with nail tape! It involves regular tape and the contrast colour for your plaid. This technique can be used for more than just plaid. If you have a hole puncher in fun shapes, the world is your oyster.

- Get your tools ready. You’ll need scotch tape, scissors, black nail polish, and a base coat polish.
- Paint as closely to the edge of the piece of tape as you can with the nail polish.
- Allow it to fully dry and then with your scissors carefully cut out thin strips.
- With your base coat in place – mine being red – being to lay out the strips on your nail with the help of a pair of tweezers.
- Press down on the tape to ensure it is adhered to your nail.
- With your scissors, remove all of the hanging pieces around the nail.
- Top with your top coat, and viola! And easy way to make your nails pop.
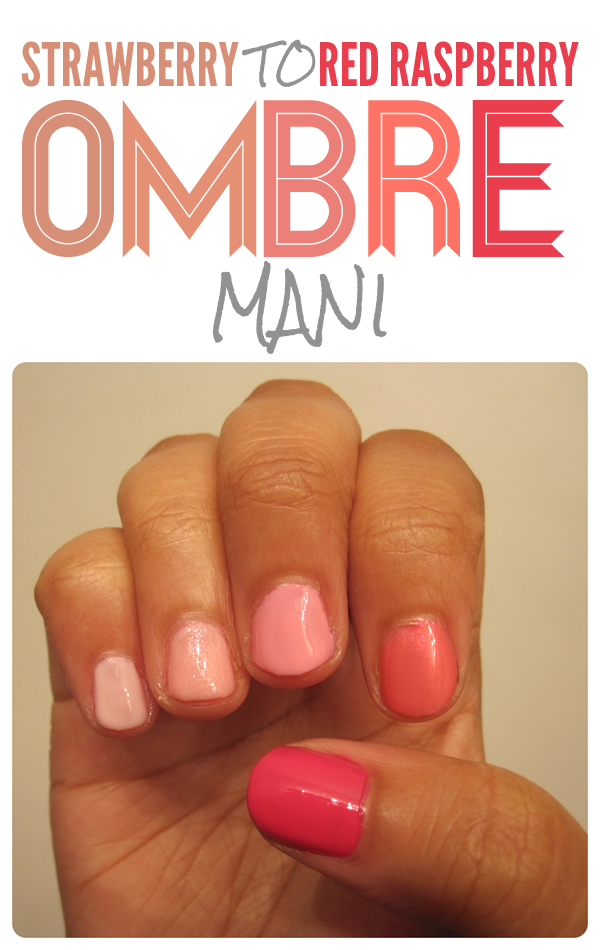
Strawberry to Red Raspberry Full Hand Ombre Mani
June 27, 2012
Manicure trends have been raising the stakes recently! One of the most eye catching is the Full Hand Ombre Manuicure. The key to an ombre manicure is subtle shade transitions from the thumb to the pinky. Typically, you start with a bold hue and slowly transition into a light shade. Let’s take it a step further and start with one color and end with another! Follow the below steps to master the Strawberry to Red Raspberry Full Hand Ombre Manicure.

Step 1 – Select your beginning and and ending shades first. This will make it easier to choose the transition shades.
Step 2 – Try to opt for colors that will make the transition subtle as opposed to numerous bold colors. Because i’m doing a two color ombre, starting with blue and ending with red, a purple shade will be a great middle color!
Step 3 – Be sure to give each shade a few coats to get the most out of each color, and always finish with a top coat to lock in shine!
The end result is sure to be unique, different, and definitely fun! Be sure to let nails dry and then go out and show off your new ‘juicy’ ombre manicure!


