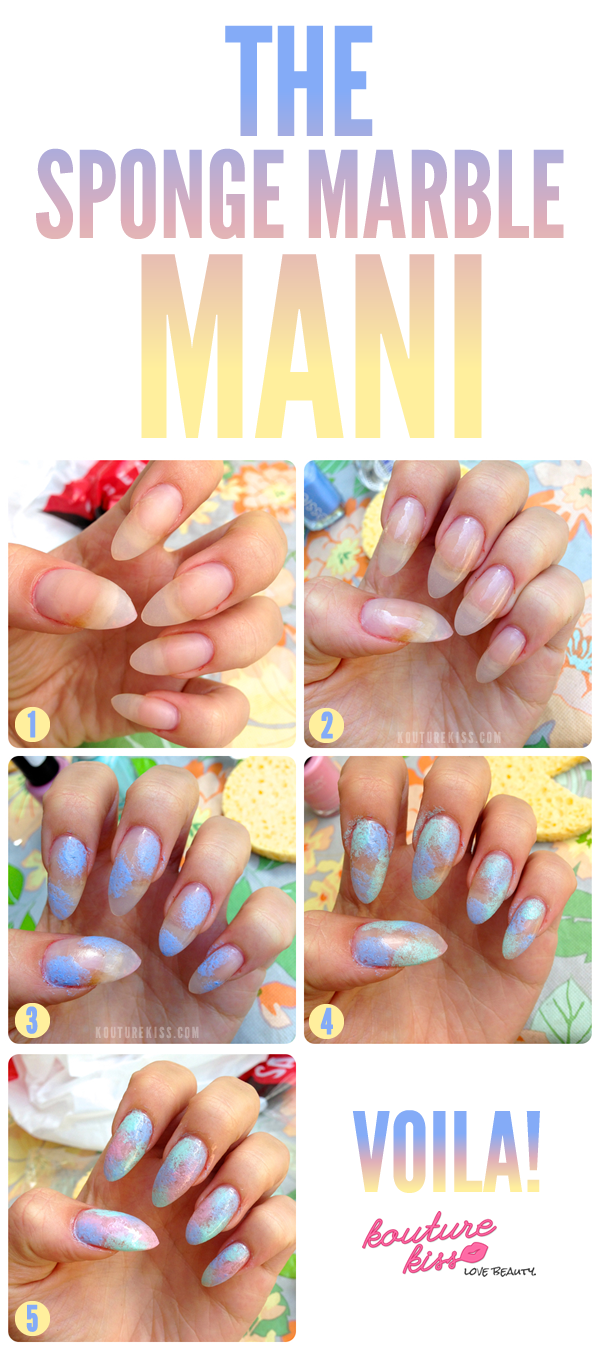
The Sponge Marble Mani
July 12, 2013

Today I am coming to you with a nail tutorial! I am usually awful at doing fancy designs on my nails, but they look so easy in the photos! This tutorial however is so simple that you could do it blind folded. This is inspired by water colors, so I kept with the pastel theme. The tools you will need are: any type of makeup sponge, a top and base coat, and however many pastel colored nail polishes you would like to use.
Step One: Start off with clean nails by using nail polish remover to remove any polish or build up.
Step Two: Prep your nails. Apply your base coat. I used OPI’s Base Coat. (more…)

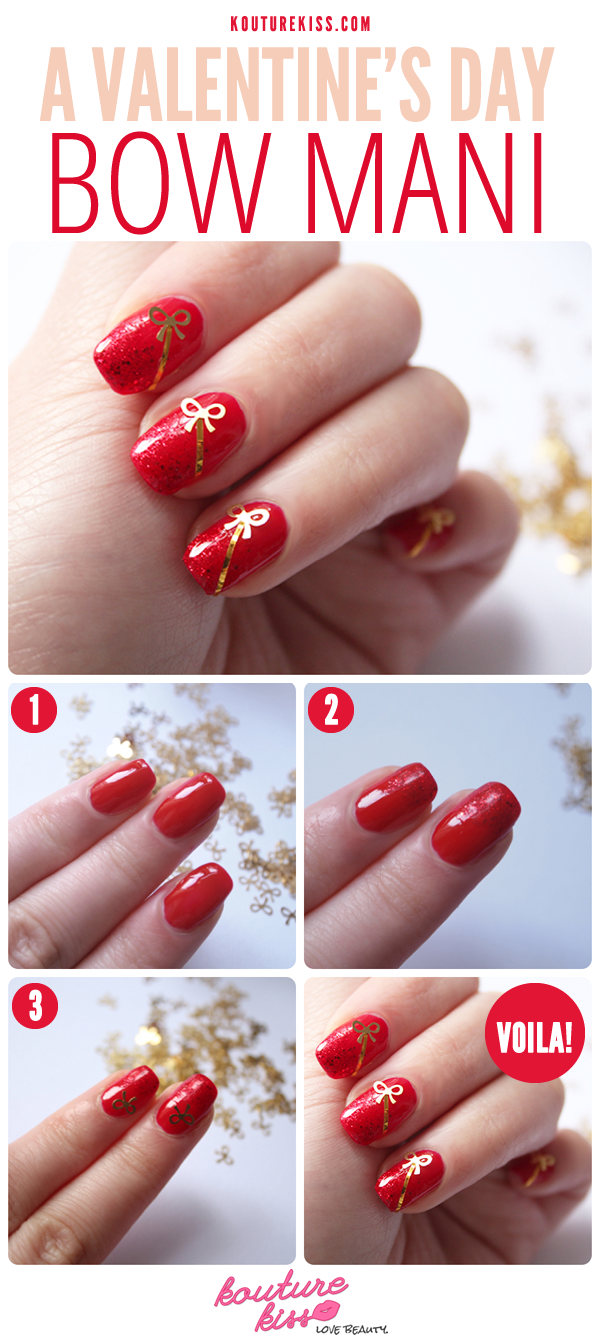
A Valentine’s Day Bow Mani
February 12, 2013
OMG, girls! It’s almost Valentine’s Day! Do you know what you are going to do, what to wear and what kind of nail art you are going to put yet? Ok, ok don’t stress! If you don’t have any inspiration for your nails, just continue reading and get some inspiration from my Valentine’s Day Bow Mani. It is very easy to do, it won’t take too long to master (it’s done in a few steps), and I’m sure your date will love it! Ok, lets get started, shall we?
Since it’s Valentine’s Day, I opted for a red nail polish, so make sure you have a red nail polish in front of you, a base and top coat, a red glittery nail polish and some bow stickers. These are the steps:
- Apply a base coat and let it dry. You always have to apply a base coat before applying any other nail polishes on your nails. Don’t forget to protect your nails girls! Apply a red nail polish on all nails and let it dry. I’m using the China Glaze #1018 Winter berry nail polish in this tutorial. (more…)
A Valentine’s Day Love Mani
February 9, 2013
Want a sweet “love” themed manicure for Valentines Day? Here’s how to get one at home in just five easy steps. You will need a base coat, a top coat, a pink glitter polish, a red polish, a sharpie marker and an eyeliner brush.
- Prep your nails with your favorite base coat or nail hardener. I used a sticky base coat to help keep the polish from chipping, longer.
- Choose a nail to use as an accent nail and paint it with your pink glitter polish.
- Once the pink glitter is dry, use your sharpie marker to plot out a heart in the center of the nail. If you do not have a steady enough hand to draw the lines don’t worry! Just make little dots to make the shape of a heart. You are going to paint over the lines anyway. I suggest using a light color so that it is easier to cover with the red polish. (more…)
Mani-Ready! How to Exfoliate, Buff and File Pre Manicure, Salon Style!
January 10, 2013

You know how sometimes you try to paint your own nails at home to save time and money, but it never really looks as nice as when they do it at a salon? Well don’t fret ladies, It’s time to learn how to prep your nails in 8 quick steps!
- Use acetone and a cotton pad to remove any old nail polish that may still be on your nails. Cotton pads are perfect because they don’t fall apart as you rub, and still get the polish off quickly and completely! And, by using 100% acetone to remove the polish, you will help sweep away any oils that could cause premature chipping.
- Time to file! Use a nail file to gently shape your nails the way you like them. I like the “Squoval” shape, because it is modern and square, and the rounded edges help prevent the nails from breaking. It is important to do this step before you get the nails wet, because wet nails are weaker and we don’t want them to snag while we file! (more…)


